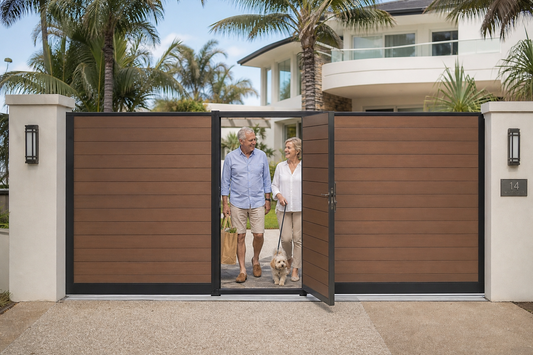
How to Install WPC Decking?
How to Install WPC Decking?
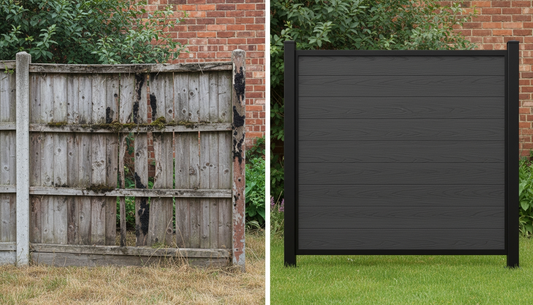
Installing Wood Plastic Composite (WPC) decking is a great way to improve your outdoor area. It combines the look of real wood with the easy care and lasting quality of modern materials. This guide is for DIY fans and homeowners who want to make their outdoor spaces better. By following these steps, you'll get a deck that lasts long and looks great.
WPC decking is made of 50% wood fibers and 50% recycled plastics. This means it needs less care than real wood. It can last 25 to 30 years, making it a durable choice. Plus, it's 100% waterproof and fights mold, mildew, rot, and termites, keeping it looking good for a long time.

Keep reading to find out how to install WPC decking yourself. We'll cover everything from the basics to the final checks. Let's turn your outdoor space into a beautiful, welcoming area you'll love for years.
Understanding the Basics of WPC Decking
Wood-Plastic Composite (WPC) decking is made from wood fibers, thermoplastics, and additives. It's 60% wood fibers, 35% High-Density Polyethylene (HDPE), and 5% additives. This mix makes it stronger than wood and less likely to rot or get damaged by water or insects.
WPC decking is also cheaper than wood, which is why many people choose it. Architects, homeowners, and designers love it for its durability and affordability.

Advantages of WPC Decking
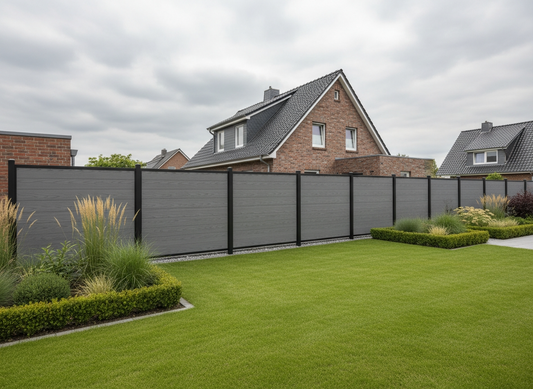
WPC decking is eco-friendly because it's made from recycled materials. No trees are cut down for its production. Companies like Rumah Lantai Indonesia use solar panels to reduce environmental impact.
It's also very durable and looks like natural wood. This makes it perfect for those who want a real wood look without the upkeep.
WPC decking can handle all kinds of weather. It's water and insect-resistant and needs little care. With the right maintenance, it can last 20 years or more. Its textured surface also makes it slip-resistant, which is great for pools or rainy areas.
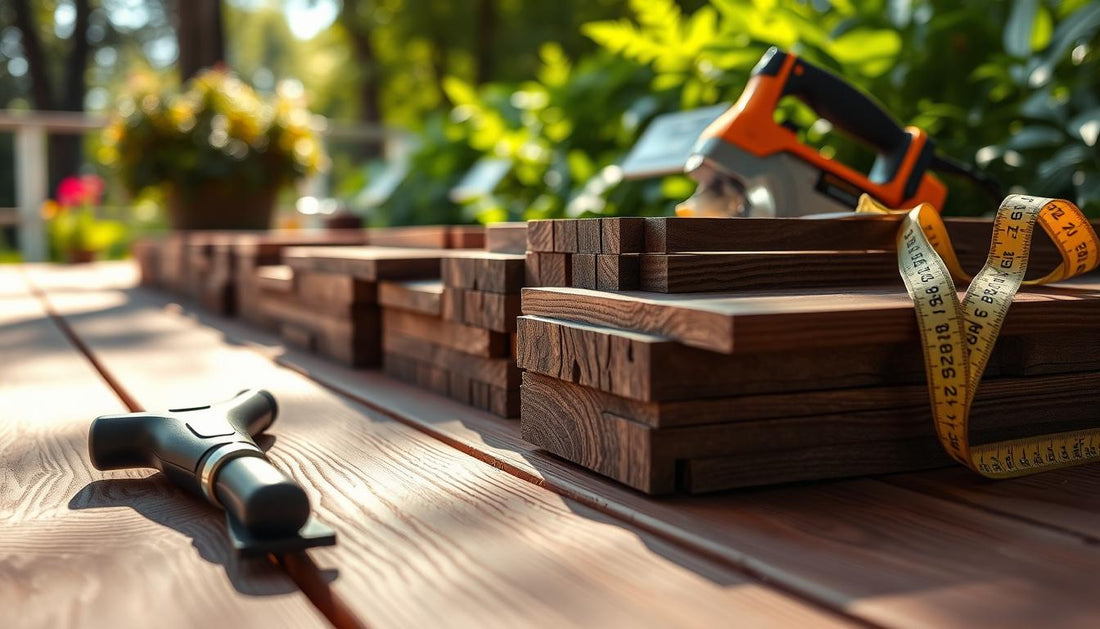
Materials and Tools Required
Installing WPC decking is easy and can be done with common tools. Here's what you'll need:
- Decking boards (WPC)
- Joists
- Screws
- Starter clips
- Power drill
- Level
- Tape measure
- Circular saw
- Safety gear (gloves, goggles)
With these tools and materials, you can install your decking easily. This will give you a beautiful and lasting outdoor space. WPC decking is a great choice for any decking project because of its many benefits and easy installation.
Preparing Your Outdoor Space
Getting your outdoor space ready for WPC decking is key to a lasting and attractive deck. It's important to create a solid base and secure the joists well. This ensures your decking stays strong and stable over time.
Building a Solid Base
To start, clear the area and level the ground. You can use concrete or compacted gravel for the base. Concrete is very stable, while gravel helps with drainage.
Here's how to build a solid base:
- Remove grass, weeds, and other plants within the area.
- Excavate to a depth of about 4-6 inches.
- Choose your base material: compacted gravel or concrete.
- Compact the chosen material using a plate compactor to create a firm and level base.
- Ensure proper drainage by slightly sloping the base away from your house.
Fixing Joists Properly
After preparing the base, fix the joists to create a strong frame for your WPC decking. Start by marking where your joists will go, making sure they're evenly spaced. For composite decking, space them about 16 inches apart.
| Joist Material | Spacing | Type |
|---|---|---|
| Treated Timber | 16 inches | Regular |
| Aluminum | 12-24 inches | Enhanced Stability |
Fixing joists right ensures a deck that lasts. Treat each joist to prevent rot and insect damage. Since WPC decking doesn't support from underneath, use screws or brackets that won't rust.
Leave a 3mm gap between board cross-sections for expansion. Use special clips to align the decking boards. This supports the boards and adds to your deck's look and strength.

By carefully preparing your outdoor space, you lay the groundwork for a durable, beautiful WPC deck. This initial step is vital to avoid future problems and keep your deck looking great for years.
Installing WPC Decking Boards
Installing WPC decking boards needs to be done right for looks and durability. This guide will show you how to start with starter clips and secure the boards properly.
Starting with Starter Clips
Start by using starter clips for a solid installation. Place them on the joists, as the manufacturer suggests, usually 16 to 24 inches apart. These clips anchor the first row of boards, keeping them stable and straight.
Placing and Securing WPC Boards
With starter clips set, begin laying the WPC decking boards. Make sure each board fits securely into the clips. Keep a gap of 1/8 to 1/4 inch between boards for drainage and expansion.
Choose high-quality fasteners like stainless steel or coated screws to prevent rust. Drive them in at an angle to hold the boards without damaging them. You'll need tools like drills and screwdrivers, costing around $200 to $500, depending on quality.
Getting the spacing and attachment right is key. Wrong spacing can cause misalignment and weaken the structure. Bad fastening can lead to boards slipping. Follow these tips for a strong, lasting, and beautiful deck.
Here's a detailed rundown of what you need for the installation process:
| Item | Description |
|---|---|
| Starter Clips | Used to securely position the initial row of WPC decking boards. |
| WPC Decking Boards | Composite boards that mimic wood but offer enhanced durability and low maintenance. |
| Screws | Stainless steel or coated to resist rust and corrosion. |
| Tools | Includes drills, screwdrivers, and saws; essential for accurate installation. |
By following these steps and using the right materials and tools, you'll have a successful and lasting WPC decking installation.
Adjusting for Different Angles
Working with WPC decking means mastering the art of adjusting decking at angles. This ensures your decking fits perfectly and stays strong. Adjusting decking at angles makes your deck look unique and polished, especially with complex layouts.
Setting the Right Angle
Setting decking angles starts with accurate measurements. Always confirm the angles and dimensions for precise cuts. For diagonal patterns, deck joists should be 12 inches apart, compared to 16 inches for straight decking.
Some brands, like WearDeck, offer reinforced construction. This allows for joist spans of up to 24 inches OC, giving you more flexibility.
Here are steps for effectively setting decking angles:
- Measure Twice, Cut Once: Always double-check measurements to ensure accuracy. This is especially crucial for diagonal and intricate patterns.
- Choose the Right Tools: Use saw blades with at least 40 teeth for clean cuts on composite materials. For example, Futurewood decking requires such precision blades to handle its abrasive nature.
- Reinforce Joist Spacing: For decking set at a 45-degree angle, the joists need closer spacing. Adhere to manufacturer-specific joist span tables to prevent compromising on strength.
Using these techniques ensures your decking stays sturdy while looking great. A proper installation process can make your deck last longer, making the effort in setting decking angles worthwhile.
Optional Step: Fascia Installation
Fascia installation for decking is optional but highly recommended. It enhances deck aesthetics and protects the structure from moisture. Fascia boards cover the deck's outer edges, giving a polished finish and preventing water damage.
Enhancing Deck Aesthetics
Fascia boards do more than protect against moisture. They also play a big role in enhancing deck aesthetics. They cover exposed edges, making the deck look seamless and finished. About 40% of WPC deck installations include fascia for a polished look.
| Decking Type | Joist Spacing |
|---|---|
| Square Hollow Decking | 300mm |
| Circle Hollow Decking | 350mm |
| Solid Decking | 400mm |
The installation process involves several steps. First, pre-drill holes to prevent cracking. Then, use color-matching fasteners for a uniform look. Make sure to space them right to avoid mold and mildew. Adding multi-layered fascias with different widths can boost both looks and function.
Installing fascia boards can take a few hours to a full day, depending on the deck's size. While it adds time, the benefits in looks and protection are worth it.
- Prevents moisture penetration
- Blocks soil and mud, preventing pest attraction
- Enhanced structural stability
- Improves overall deck aesthetics
For the best results, use screw plugs to hide screw heads. This adds to a cohesive and polished look. Proper fascia installation can greatly extend your deck's life while enhancing its aesthetics.
Performing Final Checks
After installing your WPC decking, it's important to do some final checks. These checks ensure your deck is safe and looks great. Here's how to do a complete WPC decking inspection.
Start by checking if your decking boards are stable and fit well. It's key to make sure they're securely attached. Make sure the joists are spaced correctly, between 12 to 16 inches apart.
Then, look for any gaps between the boards. These gaps, about 1/8 to 1/4 inch, help the boards expand and drain water. Walk on the deck to find any uneven spots or hazards.
Also, check that all fixtures are tight. Use stainless steel screws or hidden fasteners as recommended. This keeps your deck looking good for years without costly fixes.
Lastly, check how your deck looks. Your WPC decking should make your outdoor area look better. Make sure all edges are clean and that everything looks even and nice.
| Check | Specification | Purpose |
|---|---|---|
| Stability | Joists at 12-16 inches apart | Ensures solid structure |
| Gaps | 1/8 to 1/4 inch between boards | Allows for expansion and drainage |
| Fixtures | Stainless steel screws | Prevents loosening |
| Aesthetics | Uniform and clean edges | Enhances appearance |
Maintaining Your WPC Decking
Keeping your WPC decking clean and looking great is easy. Start with simple daily routines. Use a soft-bristle brush to sweep away dirt and debris. This keeps your deck free from dirt, grime, and mold.
Check your decking often for damage like cracks or discoloration. Fixing these problems quickly helps your deck last longer. For tough stains, consider getting a professional cleaning once a year. Companies like Oakio have the right tools and cleaners for WPC decks.
When cleaning, avoid using harsh chemicals or high-pressure washes. They can damage your deck. Instead, use mild soap and water. Make sure water drains well to prevent mold and mildew. WPC decking might change color over time, and small scratches can be sanded out.
To keep your WPC decking looking good, adjust your cleaning schedule as needed. Regular sweeping and mopping are key. For stubborn stains, professional help is a good idea. This way, your deck will stay beautiful for many years, proving WPC decking is easy to care for.
FAQ
What are the advantages of WPC decking over traditional wood decking?
WPC decking is more durable and needs less upkeep than wood. It's also eco-friendly and doesn't rot. Plus, it comes in many finishes for better looks.
What materials and tools are required for installing WPC decking?
You'll need decking boards, joists, screws, and starter clips. Don't forget drills, saws, and leveling tools. You might also need concrete or gravel, depending on your base.
How do I prepare my outdoor space for WPC decking installation?
First, make the ground level with concrete or gravel. Then, build a strong frame with treated joists. Make sure the joists are spaced right for stability.
How do I properly fix the joists when preparing for WPC decking?
Secure the joists well and space them right. This gives strong support to the WPC deck boards. Proper joist fixing is key to avoiding future problems.
How do I begin installing WPC decking boards?
Start by attaching starter clips to the joists. These clips help secure the first row of WPC deck boards and keep them aligned.
What is the correct way to place and secure WPC boards?
Put the WPC boards on starter clips and follow the manufacturer's instructions. Make sure they're aligned and spaced evenly. Don't forget to leave gaps for swelling and contraction.
How do I adjust the layout of WPC decking boards for various angles?
To fit different angles, measure and cut the boards carefully. Use the right cutting techniques to keep the structure strong and look good.
What is the purpose of installing fascia boards?
Fascia boards cover the deck's edges, giving a clean look and protecting from moisture. They also add to the deck's beauty and protection.
What final checks should I perform after installing WPC decking?
Check if the WPC deck boards are stable and fit well. Look for any gaps or loose fixtures. This ensures a professional finish and avoids problems.
How do I maintain my WPC decking?
Keep it clean with soap and water and check for issues now and then. These simple steps help your WPC decking stay durable and attractive for years.
Tags:
Previous
How Can Loglap Cladding Improve Insulation in Your Home?
Next
The Future of Sustainable Wood Products: Innovations and Trends in the Timber Industry
Related articles


Composite Fencing Cost USA: 2026 Price Guide
Jun 19 2026
