How to Install Composite Fence Panels UK: Complete Step-by-Step Guide
Composite fence panels are designed around a slot-and-rail system that, once you understand it, is faster and more forgiving to install than traditional featheredge timber. The panels are heavier and the tolerances tighter, so success depends almost entirely on getting the posts plumb, square and correctly spaced before a single board goes in. This guide walks through the full process as a competent DIYer or contractor would tackle it in 2026 — real measurements, the exact tools, both aluminium and concrete post methods, and the mistakes that cause the majority of failed installations. For the underlying product specifications referenced throughout, see our composite fence panels UK guide.
Tools and Materials You Will Need
Composite fencing does not demand specialist equipment, but it does reward having the right kit ready before you start. Cutting board mid-job with the wrong blade is the quickest way to chip a panel.

For tools you will need a post-hole digger or a petrol auger for longer runs, a spirit level (a 1.2m level is ideal) and a string line, a cordless drill/driver, a mitre saw or circular saw fitted with a fine-tooth (40-tooth or finer) TCT blade for clean composite cuts, a tape measure, a rubber mallet, and a wheelbarrow and shovel for mixing concrete. A second pair of hands is strongly recommended once you reach the panel-lifting stage.
For materials, order your composite fence panels along with the matching post system, bottom and top rails, post caps, and the manufacturer's recommended fixings — typically stainless steel or coated screws that will not corrode against the composite. You will also need postcrete or a ballast-and-cement mix (a 6:1 ballast-to-cement ratio is standard), gravel for the base of each post hole to aid drainage, and timber offcuts to brace posts while the concrete cures. Buy 5–10% more board than your raw measurement to allow for cuts and the occasional error. Working out exactly how much you need is covered next.
Planning Your Installation
Time spent planning saves hours of remedial work. Composite systems are modular, so your post positions must be set out precisely to the panel and rail lengths the manufacturer supplies.
Calculating Panel and Post Quantities
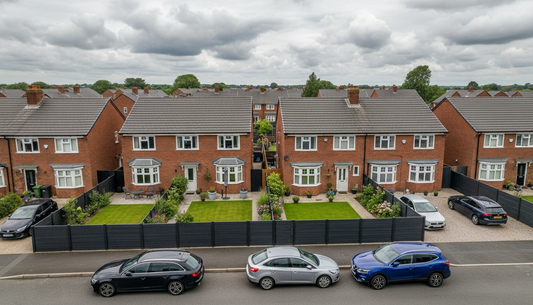
Start by measuring the total length of your fence line in metres. Composite posts are almost always set at 1.83m centres (centre of post to centre of post), which matches the standard board and rail length. Divide your total run by 1.83 to find the number of bays, then round up; the number of posts is the number of bays plus one. For a 20-metre run, that is roughly 11 bays and 12 posts. Each bay then needs its complement of fence boards stacked to your chosen height — typically 0.9m, 1.2m, 1.5m or 1.8m.
Marking Out the Fence Line
Knock a peg in at each end of the run and pull a taut string line between them at ground level — this is your reference for the whole fence. Check the line against your boundary; in the UK you should keep the fence within your own land unless you have a written party-wall agreement with your neighbour. Mark each post centre along the string at 1.83m intervals using spray paint or a peg. On sloping ground, decide early whether you will step the fence (each bay level, posts of increasing height) or rake it (panels follow the slope) — stepping is far easier with rigid composite panels and gives a cleaner finish.
Step 1 — Installing the Posts


Posts are the single most important element. A composite panel is only ever as straight, plumb and durable as the posts holding it, so do not rush this stage.
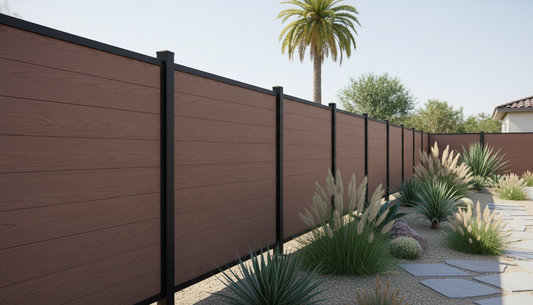
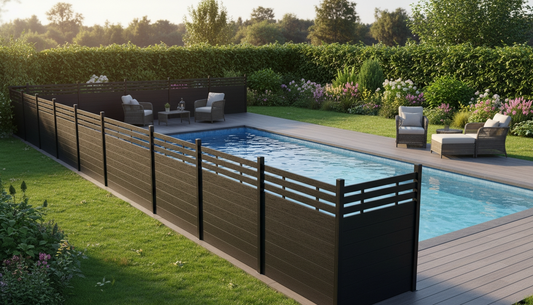
Aluminium Post System (Recommended)

For composite fencing, a powder-coated aluminium post system is the recommended choice and the one Bohai Wood supplies with its panels. Aluminium posts are light, perfectly straight, will never rot or rust through, and are engineered with integral channels that the rails and boards slot into — removing the guesswork of aligning separate fixings. Set the first post in concrete, brace it plumb in both directions with timber offcuts, and let it begin to cure before hanging anything from it. Work along the line one post at a time, slotting the bottom rail and a board or two into the previous post's channel as you position each new post, which guarantees correct spacing automatically.
Concrete Posts
Concrete posts are a valid alternative, particularly where a buyer wants to reuse an existing post line or prefers a slotted concrete system. Composite boards drop into the slots of standard UK slotted concrete posts much as gravel boards and timber do. The trade-off is weight and handling — concrete posts are heavy and unforgiving to adjust once set — and you lose the integrated top and bottom rail design of an aluminium kit. If you are matching into an existing concrete-post fence this can be the pragmatic route, but for a new run the aluminium system is usually quicker and tidier.
Post Depth and Concrete Mix
Post depth is non-negotiable for stability. For a 1.8m fence, set posts a minimum of 600mm deep; in loose, sandy or recently disturbed soil, increase this to 900mm. As a rule of thumb the buried portion should be at least one-third of the above-ground height. Dig the hole roughly three times the width of the post, add 50–75mm of gravel at the base for drainage, then position the post and pour postcrete or a 6:1 ballast-cement mix around it. Keep checking plumb with your level as you fill, brace the post, and allow at least 24–48 hours of curing before loading the panels. Slope the top of the concrete away from the post so water drains off rather than pooling.
Step 2 — Fitting the Bottom Rail

With your first two posts set and cured, the bottom rail is fitted between them. On an aluminium system the bottom rail locates into the routed channel on the inner face of each post and is secured with the supplied brackets and stainless fixings. The rail should sit a consistent height above ground along the whole run — typically 30–50mm clearance — so air can circulate beneath the boards and water never sits against them. Use your string line and spirit level to confirm the rail is dead level before fixing; this rail sets the datum for every board above it, so an error here is multiplied up the whole panel. Leave a small expansion gap at each end as specified by the manufacturer, because composite expands and contracts with temperature.
Step 3 — Inserting the Fence Boards

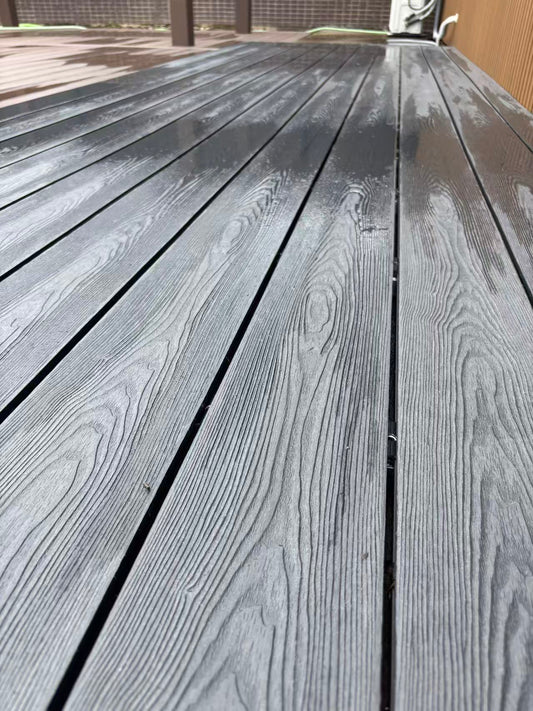
This is the satisfying part. With the bottom rail level and fixed, the composite fence boards slide horizontally into the post channels and stack on top of one another, each board's profile interlocking with the one below. Drop the first board in, seat it onto the bottom rail, and tap it home gently with a rubber mallet — never a steel hammer, which will mark the surface. Continue stacking boards to your chosen height, checking every third or fourth board for level. Because the boards float within the channels, you must leave the manufacturer's specified expansion gap (commonly 5–8mm) at the board ends; pinching the boards tight is a leading cause of summer bowing. Cut boards to length, where a run does not divide evenly, with your fine-tooth blade, and place cut ends into the post channel so the factory edge always shows.
Step 4 — Fitting the Top Rail and Post Caps


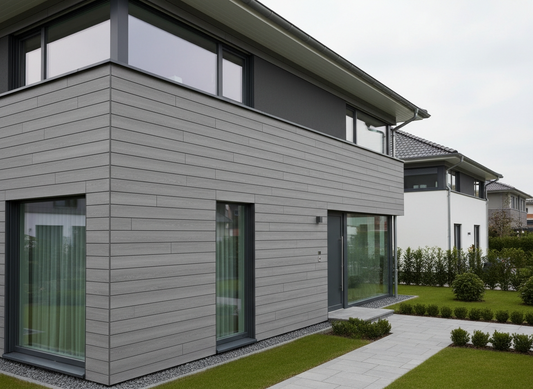
Once the final board is seated, the top rail caps the stack and locks the boards into the assembly. Slot it down over the top board and into the post channels, then fix it through the brackets as you did the bottom rail, keeping it level along the run. Finally, fit the post caps to the top of each post. These are not merely decorative: they seal the hollow post against rainwater ingress, which is essential for the longevity of both aluminium and composite posts. Press or screw each cap home according to the system, and wipe the whole fence down to remove handling marks. A correctly finished composite fence needs no painting, staining or sealing — that is the entire point of the material.
Common Installation Mistakes to Avoid
Most composite fence failures trace back to a short list of avoidable errors. The most common is omitting expansion gaps: composite expands in summer heat, and boards packed tight with nowhere to move will bow or push posts out of line. Second is insufficient post depth or weak concrete — under-setting posts on a 1.8m fence guarantees movement in the first strong wind. Third is incorrect post spacing; deviating from 1.83m centres means boards either will not reach or sit loose in the channel. Fourth is cutting with a coarse blade, which chips and frays the board edge. Fifth is fixing boards rigidly through their faces as you would timber — composite boards must float in the channels, not be screwed solid. Finally, ignoring ground clearance and letting boards sit in soil or standing water invites staining over time. Get the posts right, respect the expansion gaps, and the rest follows.
DIY or Hire a Contractor?
A confident DIYer with basic groundwork experience can absolutely install composite fencing — the slot system is more forgiving than it looks, and a short run of four to six bays is a realistic weekend project for two people. The decisive factors are the groundwork and the lifting. Digging and concreting a dozen post holes is hard physical work, and 1.8m panels are heavy enough that a second person is essential for safe handling. If your run is long, the ground is rocky or waterlogged, or the fence must be dead straight on a visible boundary, a professional installer is money well spent. UK fencing contractors typically charge £300–£400 per day, and most domestic runs are completed in one to three days. Either way, the panels themselves are the same; what you are paying a contractor for is speed and a guaranteed plumb, square result.
FAQ
Q: Can I install composite fence panels myself?
A: Yes. The slot-and-rail design of composite fencing is well suited to competent DIYers, as boards simply stack into channels on the posts. The main demands are accurate groundwork — digging and concreting posts plumb at 1.83m centres — and safe handling, since panels are heavy and best lifted by two people. A short run is a realistic weekend job. For long, sloping or highly visible boundaries, hiring a contractor is often worth the cost.
Q: What post spacing for composite fencing?
A: Composite fence posts are set at 1.83m centres — measured from the centre of one post to the centre of the next — which matches the standard board and rail length. Maintaining this spacing exactly is critical: too wide and the boards will not reach into the channels, too narrow and they sit loose. Mark every post position along a string line before digging to ensure each bay matches the panel system you have ordered.
Q: How deep should composite fence posts be set?
A: For a 1.8m composite fence, set posts a minimum of 600mm deep in firm ground. In loose, sandy or recently disturbed soil, increase this to 900mm. A good rule is that the buried depth should be at least one-third of the above-ground height. Dig the hole around three times the post width, add gravel for drainage, set in postcrete or a 6:1 ballast-cement mix, brace plumb, and allow 24–48 hours to cure before loading panels.
Q: Do I need planning permission to install composite fencing?
A: In most cases, no. Under UK permitted development rights you can build a fence up to 2m high in a back garden, or up to 1m high in a front garden adjoining a road, without planning permission. Permission is required in conservation areas, for listed buildings, or where restrictive covenants apply on new-build estates. Always confirm your boundary position and check with your local planning authority if you are unsure before starting work.
Q: How long does installation take?
A: A typical domestic composite fence run takes one to three days. The biggest variable is the groundwork: digging and concreting posts is the slowest stage, and posts then need 24–48 hours to cure before panels are loaded — so many installers concrete posts on day one and fit boards on day two. A short four-to-six bay run is achievable in a weekend by two people; longer or sloping runs take proportionally longer.
Ready to Get Started?
Tags: